Building a Collaborative Pixel Art Editor with CRDTs
Welcome back! In An Interactive Intro to CRDTs  An Interactive Intro to CRDTs | jakelazaroff.com CRDTs don't have to be all academic papers and math jargon. Learn what CRDTs are and how they work through interactive visualizations and code samples.
 jakelazaroff.com/words/an-interactive-intro-to-crdts/ , we learned what CRDTs are, and implemented two: a Last Write Wins Register and a Last Write Wins Map. We now have everything we need to build a collaborative pixel art editor, and in this post we’ll do just that. This post will be heavier on JavaScript and graphics programming, because I want to show how CRDTs can be used in an actual app.
As a reminder, this is what we’re building:
This post assumes no prior knowledge about CRDTs other than the previous post — so if you haven’t read it yet, go back and do that now An Interactive Intro to CRDTs | jakelazaroff.com CRDTs don't have to be all academic papers and math jargon. Learn what CRDTs are and how they work through interactive visualizations and code samples. jakelazaroff.com/words/an-interactive-intro-to-crdts/ ! — and only a rudimentary knowledge of TypeScript.1
Building the CRDT
Before we start on the CRDT, we need just one more type. We’ll store colors as tuples of three integers, representing red, green and blue values.
type RGB = [red: number, green: number, blue: number];
With that out of the way, let’s build the CRDT! It’ll be a class called PixelData:
class PixelData {
  readonly id: string;
  #data: LWWMap<RGB>;

  constructor(id: string) {
    this.id = id;
    this.#data = new LWWMap(this.id, {});
  }

  /**
   * Returns a stringified version of the given coordinates.
   * @param x X coordinate.
   * @param y Y coordinate.
   * @returns Stringified version of the coordinates.
   */
  static key(x: number, y: number) {
    return `${x},${y}`;
  }

  get value() {
    return this.#data.value;
  }

  get state() {
    return this.#data.state;
  }

  set(x: number, y: number, value: RGB) {
    const key = PixelData.key(x, y);
    this.#data.set(key, value);
  }

  get(x: number, y: number): RGB {
    const key = PixelData.key(x, y);

    const register = this.#data.get(key);
    return register ?? [255, 255, 255];
  }

  delete(x: number, y: number) {
    const key = PixelData.key(x, y);
    this.#data.delete(key);
  }

  merge(state: PixelData["state"]) {
    this.#data.merge(state);
  }
}
This is only a thin wrapper over a LWW Map. Almost every method just calls the corresponding LWW Map method!
The biggest change involves the static method key. When we’re interacting with the pixel art editor, it’s most natural to think in terms of (x,y) coordinates. But our LWW Map needs string keys! The key static method serializes coordinate pairs to strings — for example, (15,29) becomes "15,29". Since the LWW Map values are colors in the form of RGB tuples, we can think of this data structure as mapping from pixel coordinates to colors, with each key representing a single pixel.
The get method is also slightly different. We want our pixels to default to white. So if no value has been set, we return a default value of [255, 255, 255].
Let’s peek under the hood and see what will happen to each register in the map when we draw.2
Here we can really see how the keys and values interact. When painting the top left square, the key "0,0" is set to the RGB color you have selected ([0, 0, 0] if you didn’t change from the default). We can also see how pixels that haven’t yet been set default to white. Painting over a pixel overwrites the value and increments the timestamp by one. If you turn the network off and paint the same pixels on each canvas, the ones with the higher timestamps will win out when you turn the network back on.
This visualization takes a lot of space for just a few pixels. Instead, let’s overlay each pixel with the timestamp of its register:
Now we can see how each pixel should interact in the context of the picture.
That’s it! That’s the whole CRDT! As you read through the rest of the post, you’ll see that the app mostly doesn’t even realize that it’s using a CRDT under the hood.
Scaffolding the UI
Now that we have our CRDT, we need to set up the UI. Here’s the HTML and CSS:
<div class="wrapper">
  <div class="canvases">
    <canvas class="canvas" id="alice"></canvas>
    <canvas class="canvas" id="bob"></canvas>
  </div>
  <input class="color" type="color" value="#000000" />
</div>

<style>
  .wrapper {
    display: inline-flex;
    flex-direction: column;
    gap: 1rem;
  }

  .canvases {
    display: flex;
    gap: 1rem;
  }

  .canvas {
    width: 25rem;
    height: 25rem;
    border: 0.25rem solid #eeeeee;
    border-radius: 0.25rem;
    cursor: crosshair;
    touch-action: none;
  }

  .color {
    border: 0;
  }
</style>
Then a little JavaScript to instantiate our two editors:
// get alice's canvas
const acanvas = document.querySelector("#alice");
if (!(acanvas instanceof HTMLCanvasElement)) throw new Error(`<canvas id="alice"> not found!`);

// get bob's canvas
const bcanvas = document.querySelector("#bob");
if (!(bcanvas instanceof HTMLCanvasElement)) throw new Error(`<canvas id="bob"> not found!`);

// get the color input
const palette = document.querySelector(`input[type="color"]`);
if (!(palette instanceof HTMLInputElement)) throw new Error(`<input type="color"> not found!`);

// set the artboard size
const artboardSize = { w: 100, h: 100 };

// instantiate the two `PixelEditor` classes
const alice = new PixelEditor(acanvas, artboardSize);
const bob = new PixelEditor(bcanvas, artboardSize);

// merge the states whenever either editor makes a change
alice.onchange = state => bob.receive(state);
bob.onchange = state => alice.receive(state);

// set the color whenever the palette input changes
palette.oninput = () => {
  const hex = palette.value.substring(1).match(/[\da-f]{2}/g) || [];
  const rgb = hex.map(byte => parseInt(byte, 16));
  if (rgb.length === 3) alice.color = bob.color = rgb as RGB;
};
Let’s break this down a bit:
- Query the DOM for the two
<canvas>elements and the color input. - Store the artboard size. These are the drawable dimensions, and they might be different from the size of the
<canvas>element. For example, the canvas might be 400×400, but we might want our picture to only be 40×40, where each “pixel” the user sees takes up 10×10 actual pixels on the canvas. For clarity, “artboard” will always refer to what the user perceives and interacts with, while “canvas” will refer to the underlying<canvas>element. - Instantiate a
PixelEditorclass (which we’ll write shortly) with a<canvas>element and the artboard size. - When a change happens in either editor, merge the state with the other.
- Set the editor color whenever the color input changes. HTML color inputs return their color as hex code strings3 (for example,
#845ef7) so we need to do a little work to convert it to RGB format. This code just removes the#, splits the string into two-character chunks and parses each of them from a base 16 integer into a JSnumber— which is exactly what ourRGBtype expects.
As you can see, we’re only simulating the network. Actually writing network code is a separate problem from designing and using the CRDT data structure.4
Starting the Editor
Let’s define the PixelEditor class now. Here’s the skeleton:
class PixelEditor {
  /** The underlying <canvas> element */
  #el: HTMLCanvasElement;

  /** The 2D canvas rendering context */
  #ctx: CanvasRenderingContext2D;

  /** The artboard size, in drawable pxiels */
  #artboard: { w: number; h: number };

  /** The underlying pixel data */
  #data = new PixelData();

  /** The selected color */
  #color: RGB = [0, 0, 0];

  /** Listeners for change events */
  #listeners: Array<(state: PixelData["state"]) => void> = [];

  constructor(el: HTMLCanvasElement, artboard: { w: number; h: number }) {}

  /**
   * Appends a listener to be called when the state changes.
   * @param listener */
  set onchange(listener: (state: PixelData["state"]) => void) {}

  /** Sets the drawing color. */
  set color(color: RGB) {}

  /**
   * Handles events on the canvas.
   * @param e Pointer event from the canvas element.
   */
  handleEvent(e: PointerEvent) {}

  /**
   * Sets pixel under the mouse cursor with the current color.
   * @param x X coordinate of the destination pixel.
   * @param y Y coordinate of the destination pixel.
   */
  #paint(x: number, y: number) {}

  /** Draws each pixel on the canvas. */
  async #draw() {}

  /** Notify all listeners that the state has changed. */
  #notify() {}

  /**
   * Merge remote state with the current state and redraw the canvas.
   * @param state State to merge into the current state. */
  receive(state: PixelData["state"]) {}
}
The methods are empty (for now), but hopefully this gives a decent idea of what the shape of this program will be. At a high level, when the user draws on the canvas with their mouse, the PixelEditor…
- Receives DOM events (
handleEvent) and sets the selected color (#paint) in itsPixelDataCRDT. - Draws to the canvas (
#draw) based on itsPixelDataCRDT value. - Notifies any listeners (
#notify) that its data has changed.
On the other end, when a PixelEditor receives state from a peer (receive) it updates its own PixelData CRDT and then draws to the canvas (#draw).
Cool, so let’s start filling in those missing PixelEditor methods. First up, the constructor:
  constructor(el: HTMLCanvasElement, artboard: { w: number; h: number }) {
    this.#el = el;

    // get the 2D rendering context
    const ctx = el.getContext("2d");
    if (!ctx) throw new Error("Couldn't get rendering context");
    this.#ctx = ctx;

    // store the artboard size
    this.#artboard = artboard;

    // listen for pointer events
    this.#el.addEventListener("pointerdown", this);
    this.#el.addEventListener("pointermove", this);
    this.#el.addEventListener("pointerup", this);

    // resize the canvas
    this.#el.width = this.#el.clientWidth * devicePixelRatio;
    this.#el.height = this.#el.clientHeight * devicePixelRatio;
    this.#ctx.scale(devicePixelRatio, devicePixelRatio);
    this.#ctx.imageSmoothingEnabled = false;
  }
- Store the
<canvas>element and get the 2D rendering context. - Store the artboard size. We’ll use this later to convert between the artboard resolution and the canvas resolution.
- Listen for
pointerdown,pointermoveandpointerupevents. These will be triggered when the user interacts with the canvas. - Resize the canvas size to match the dimensions of the
<canvas>element.5
Now onto the instance methods. First up, color:
  /** Sets the drawing color. */
  set color(color: RGB) {
    this.#color = color;
  }
This is just a setter that takes an RGB tuple and sets the drawing color. You might remember that when we set up our HTML, we called this setter from outside the class in response to input events on the color input.
Next, handleEvent:
  /**
   * Handles events on the canvas.
   * @param e Pointer event from the canvas element.
   */
  handleEvent(e: PointerEvent) {
    switch (e.type) {
      // @ts-expect-error
      case "pointerdown": {
        this.#el.setPointerCapture(e.pointerId);
        // fallthrough
      }

      case "pointermove": {
        if (!this.#el.hasPointerCapture(e.pointerId)) return;

        // convert canvas pixels to artboard pixels
        const x = Math.floor((this.#artboard.w * e.offsetX) / this.#el.clientWidth),
          y = Math.floor((this.#artboard.h * e.offsetY) / this.#el.clientHeight);

        this.#paint(x, y);
        break;
      }

      case "pointerup": {
        this.#el.releasePointerCapture(e.pointerId);
        break;
      }
    }
  }
This handles all three types of pointer events. Let’s go through them one by one:
pointerdownis triggered when the user depresses the mouse button or touches their finger to the screen. CallingsetPointerCaptureon the<canvas>element “captures” the pointer, which lets us figure out whether discrete events are part of one continuous drag. We also want to draw a pixel, which uses the same logic as thepointermoveevent, so we fall through to the next switch case.6pointermoveis triggered when the pointer, uh, moves. At the top, we check whether the pointer is captured, so we can ignore mouse events if the user isn’t holding down the mouse button. Then, we convert from canvas pixels to artboard pixels and call the#paintmethod to draw the pixel on the canvas.pointerupis triggered when the user releases the mouse button or removes their finger from the screen. We clean up by callingreleasePointerCapture.
Since we’ve just called the #paint method, let’s see what it looks like:
  /**
   * Sets pixel under the mouse cursor with the current color.
   * @param x X coordinate of the destination pixel.
   * @param y Y coordinate of the destination pixel.
   */
  #paint(x: number, y: number) {
    if (x < 0 || this.#artboard.w <= x) return;
    if (y < 0 || this.#artboard.h <= y) return;

    this.#data.set(x, y, this.#color);
    this.#draw();
  }
Simple enough: if the given coordinates are inside the artboard, it sets the coordinates to the active color in #data (an instance of the PixelData class we defined before) and then draws to the canvas. Like I said, we don’t really care at this point that PixelData class is actually a CRDT — as far as the PixelEditor class is concerned, it’s just setting a color in its data.
Now, #draw. The basic idea is that we’ll allocate a buffer — a contiguous chunk of memory, like an array — and then we write the raw pixel data there. Once we’ve done that, the canvas API lets us draw the raw pixel data onto the canvas. Here’s what it looks like:
  /** Draw each pixel on the canvas. */
  async #draw() {
    /** Number of channels per pixel; R, G, B, A */
    const chans = 4;

    /** A buffer to hold the raw pixel data.
     * Each pixel corresponds to four bytes in the buffer,
     * so the full size is the number of pixels times the number of channels per pixel. */
    const buffer = new Uint8ClampedArray(this.#artboard.w * this.#artboard.h * chans);

    /** The number of bytes in the buffer representing a single artboard row. */
    const rowsize = this.#artboard.w * chans;

    for (let row = 0; row < this.#artboard.h; row++) {
      // calculate the byte offset of the start of the row relative to the start of the buffer
      const offsetY = row * rowsize;

      for (let col = 0; col < this.#artboard.w; col++) {
        // calculate the byte offset of the pixel relative to the start of the row
        const offsetX = col * chans;

        // calculate the byte offset of the pixel relative to the start of the buffer
        const offset = offsetY + offsetX;

        const [r, g, b] = this.#data.get(col, row);
        buffer[offset] = r;
        buffer[offset + 1] = g;
        buffer[offset + 2] = b;
        buffer[offset + 3] = 255;
      }
    }

    const data = new ImageData(buffer, this.#artboard.w, this.#artboard.h);
    const bitmap = await createImageBitmap(data);
    this.#ctx.drawImage(bitmap, 0, 0, this.#el.clientWidth, this.#el.clientHeight);
  }
Slight tangent into how colors are represented in memory. RGB colors consist of three channels — red, green and blue — each of which is a single number between 0 and 255, or eight bits (one byte). That’s 24-bit color. The canvas API uses 32-bit color, which adds one extra channel — alpha, or transparency — which is also a single number between 0 and 255. So each pixel takes up up four bytes.
First, we need to allocate a buffer to hold the pixel data.7 Since we know the pixel dimensions of the artboard, we can calculate how big of a buffer we need: four bytes per pixel times the artboard width times the artboard height. From there, we iterate over the rows and columns of the artboard, calculating each pixel’s byte offset into the buffer. Then we write the pixel color values into the next four bytes of the buffer following that offset.
If you’re not familiar with how to calculate the offset, try the playground below. Hover over different pixels in the “artboard” at the top or the “buffer” at the bottom to see how they correspond to each other.
The first four bytes (0–3) are the red, green, blue and alpha channels of the top left pixel. The next four bytes (4–7) are the pixel second from the left on the top row — and so on, until we hit the top right pixel. Then, we wrap around — the next four bytes of the buffer are the leftmost pixel on the second row — and continue going, until finally we get to the bottom right pixel in the last four bytes of the buffer.
Finally, we draw that buffer to the canvas.8 Phew!
At this point, we have a fully functional pixel art editor without the peer-to-peer parts:
Before we can connect the two editors, we need to fix a big issue with the drawing. You’ve probably noticed it already: if you move quickly, there are gaps between the pixels.
Drawing Lines
The problem is that events don’t necessarily get triggered as fast as the user can move their cursor, which means that the coordinates for each call to #paint might not be next to each other. We can fix this by storing the pixel coordinates of the pointer during the previous event, and drawing a line between them and the current coordinates. Buckle up, because we’re about to make a bunch of changes to our PixelEditor class.
First, we’ll add a private #prev property that holds either an (x,y) coordinate pair, or undefined:
class PixelEditor {
  // ...

  /** The previous position of the mouse cursor */
  #prev: [x: number, y: number] | undefined;

  // ...
}
Then, we’ll modify our handleEvent method. We need to store the cursor’s coordinates on the artboard in #prev as the very last step in the pointermove case,9 right before the break. Then, in the pointerup case, we need to reset #prev to undefined:
  /**
   * Handles events on the canvas.
   * @param e Pointer event from the canvas element.
   */
  handleEvent(e: PointerEvent) {
    switch (e.type) {
      // ...

      case "pointermove": {
        // ...

        this.#prev = [x, y];
        break;
      }

      case "pointerup": {
        // ...
        this.#prev = undefined;
        break;
      }
    }
  }
The biggest changes are in our #paint method, where we need to implement the line drawing. There are a bunch of algorithms for doing this; we’ll use one called Digital Differential Analyzer ![]() Line Generation Algorithm Line Generation Algorithm - A line connects two points. It is a basic element in graphics. To draw a line, you need two points between which you can draw a line. In the following three algorithms, we refer the one point of line as $X_{0}, Y_{0}$ and the second point of line as $X_{1}, Y_{1}$.
Line Generation Algorithm Line Generation Algorithm - A line connects two points. It is a basic element in graphics. To draw a line, you need two points between which you can draw a line. In the following three algorithms, we refer the one point of line as $X_{0}, Y_{0}$ and the second point of line as $X_{1}, Y_{1}$. www.tutorialspoint.com/computer_graphics/line_generation_algorithm.htm . That link explains the steps in detail, so I’ll just skip to the implementation:
  /**
   * Sets pixel under the mouse cursor with the current color.
   * If the user is dragging their cursor, also fills in pixels between the given coordinates and the previous ones.
   * @param x X coordinate of the destination pixel.
   * @param y Y coordinate of the destination pixel.
   */
  #paint(x: number, y: number) {
    if (x < 0 || this.#artboard.w <= x) return;
    if (y < 0 || this.#artboard.h <= y) return;

    this.#data.set(x, y, this.#color);

    let [x0, y0] = this.#prev || [x, y];

    const dx = x - x0,
      dy = y - y0;

    const steps = Math.max(Math.abs(dx), Math.abs(dy));
    const xinc = dx / steps,
      yinc = dy / steps;

    for (let i = 0; i < steps; i++) {
      x0 += xinc;
      y0 += yinc;
      const x1 = Math.round(x0);
      const y1 = Math.round(y0);

      this.#data.set(x1, y1, this.#color);
    }

    this.#draw();
  }
We’re now drawing smooth, connected lines! Check it out:
Syncing state
Finally, we’re ready to connect these two canvases together. Whenever one peer makes a change, we’ll send its state to the other. After that peer’s PixelData CRDT merges the incoming state into its own, both canvases will have converged upon the same state.
You might remember the PixelEditor property #listeners from way back, when we wrote the skeleton of the class. We’re about to put it to use. First, we’ll fill out the onchange setter:
  /**
   * Appends a listener to be called when the state changes.
   * @param listener */
  set onchange(listener: (state: PixelData["state"]) => void) {
    this.#listeners.push(listener);
  }
This takes an callback function and adds it to #listeners.
Next, we need a way to notify the listeners that the data changed. That method is called #notify:
  /** Notify all listeners that the state has changed. */
  #notify() {
    const state = this.#data.state;
    for (const listener of this.#listeners) listener(state);
  }
It grabs the current state from the PixelData CRDT stored in #data. Then, it iterates through each listener and calls it with that state.
Finally, we need to actually call our #notify method. We’ll nestle that right at the end of #paint, so that any time we change the state we also notify all the listeners:
  /**
   * Sets pixel under the mouse cursor with the current color.
   * If the user is dragging their cursor, also fills in pixels between the given coordinates and the previous ones.
   * @param x X coordinate of the destination pixel.
   * @param y Y coordinate of the destination pixel.
   */
  #paint(x: number, y: number) {
    // ...

    this.#notify();
  }
That takes care of the sending. On the other end, we need to merge the data into our local state when we receive it from another peer. This last method is called receive:
  /**
   * Merge remote state with the current state and redraw the canvas.
   * @param state State to merge into the current state. */
  receive(state: PixelData["state"]) {
    this.#data.merge(state);
    this.#draw();
  }
We’re familiar with this pattern by now: when a CRDT has to merge some state, it sends parts of it to the appropriate CRDTs. In this case, PixelEditor isn’t a CRDT, so we’re just sending the whole thing off to #data to be merged.
And that’s it! Take a look at our two connected pixel art editors.
Fixing Timestamps
We’re almost done, but there’s one more optimization I want to make. We know that under the hood, each pixel is a LWW Register, which means it has a timestamp. Peers will compare those timestamps when merging their state.
But right now, if you click and drag around, the timestamps get weirdly high — especially if you go slowly. Here’s a playground with a lower resolution that shows each pixel’s timestamp.
The problem is pointer events can fire a lot — often, multiple times on the same artboard pixel. To solve this, we’ll keep a set of each pixel we’ve painted during a single drag operation, and ensure we don’t change any pixels already in the set.10
First, let’s add a set of all the keys we’ve painted to our PixelEditor class:
class PixelEditor {
  // ...

  /** The set of pixel keys that have been painted during the current drag operation */
  #painted = new Set<string>();

  // ...
}
Next, we’ll add a #checkPainted method. It will take an (x,y) coordinate pair and return whether it’s in the set of painted pixels.
  /**
   * Check whether a pixel has been painted during the current drag operation
   * @param x X coordinate of the target pixel.
   * @param y Y coordinate of the target pixel.
   */
  #checkPainted(x: number, y: number) {
    const key = PixelData.key(x, y);

    const painted = this.#painted.has(key);
    this.#painted.add(key);

    return painted;
  }
It also adds the coordinates to the set, so any successive calls to #checkPainted with the same coordinates return true. The order of these statements is important: we need to first check whether the pixel was already painted, then add it to the set, and finally return whether it was in the set before we added it.
We’ll use #checkPainted in the #paint method before we set a color for any pixel:
  /**
   * Sets pixel under the mouse cursor with the current color.
   * If the user is dragging their cursor, also fills in pixels between the given coordinates and the previous ones.
   * @param x X coordinate of the destination pixel.
   * @param y Y coordinate of the destination pixel.
   */
  #paint(x: number, y: number) {
    // ...

    if (!this.#checkPainted(x, y)) this.#data.set(x, y, this.#color);

    // ...

    for (let i = 0; i < steps; i++) {
      // ...

      if (!this.#checkPainted(x1, y1)) this.#data.set(x1, y1, this.#color);
    }
  }
Finally, on the pointerup event, just as we reset #prev, we also need to reset #painted:
  /**
   * Handles events on the canvas.
   * @param e Pointer event from the canvas element.
   */
  handleEvent(e: PointerEvent) {
    switch (e.type) {
			// ...

      case "pointerup": {
				// ...
        this.#painted.clear();
        break;
      }
    }
  }
Now, each pixel’s timestamp will be incremented by at most 1 during each drag:
The End!
We made it! We have a completed collaborative pixel art editor, built with CRDTs. Take a look at what we’ve built and give yourself a pat on the back.
If you’d like to play with this on your own, I’ve made a CodeSandbox with everything we’ve written here 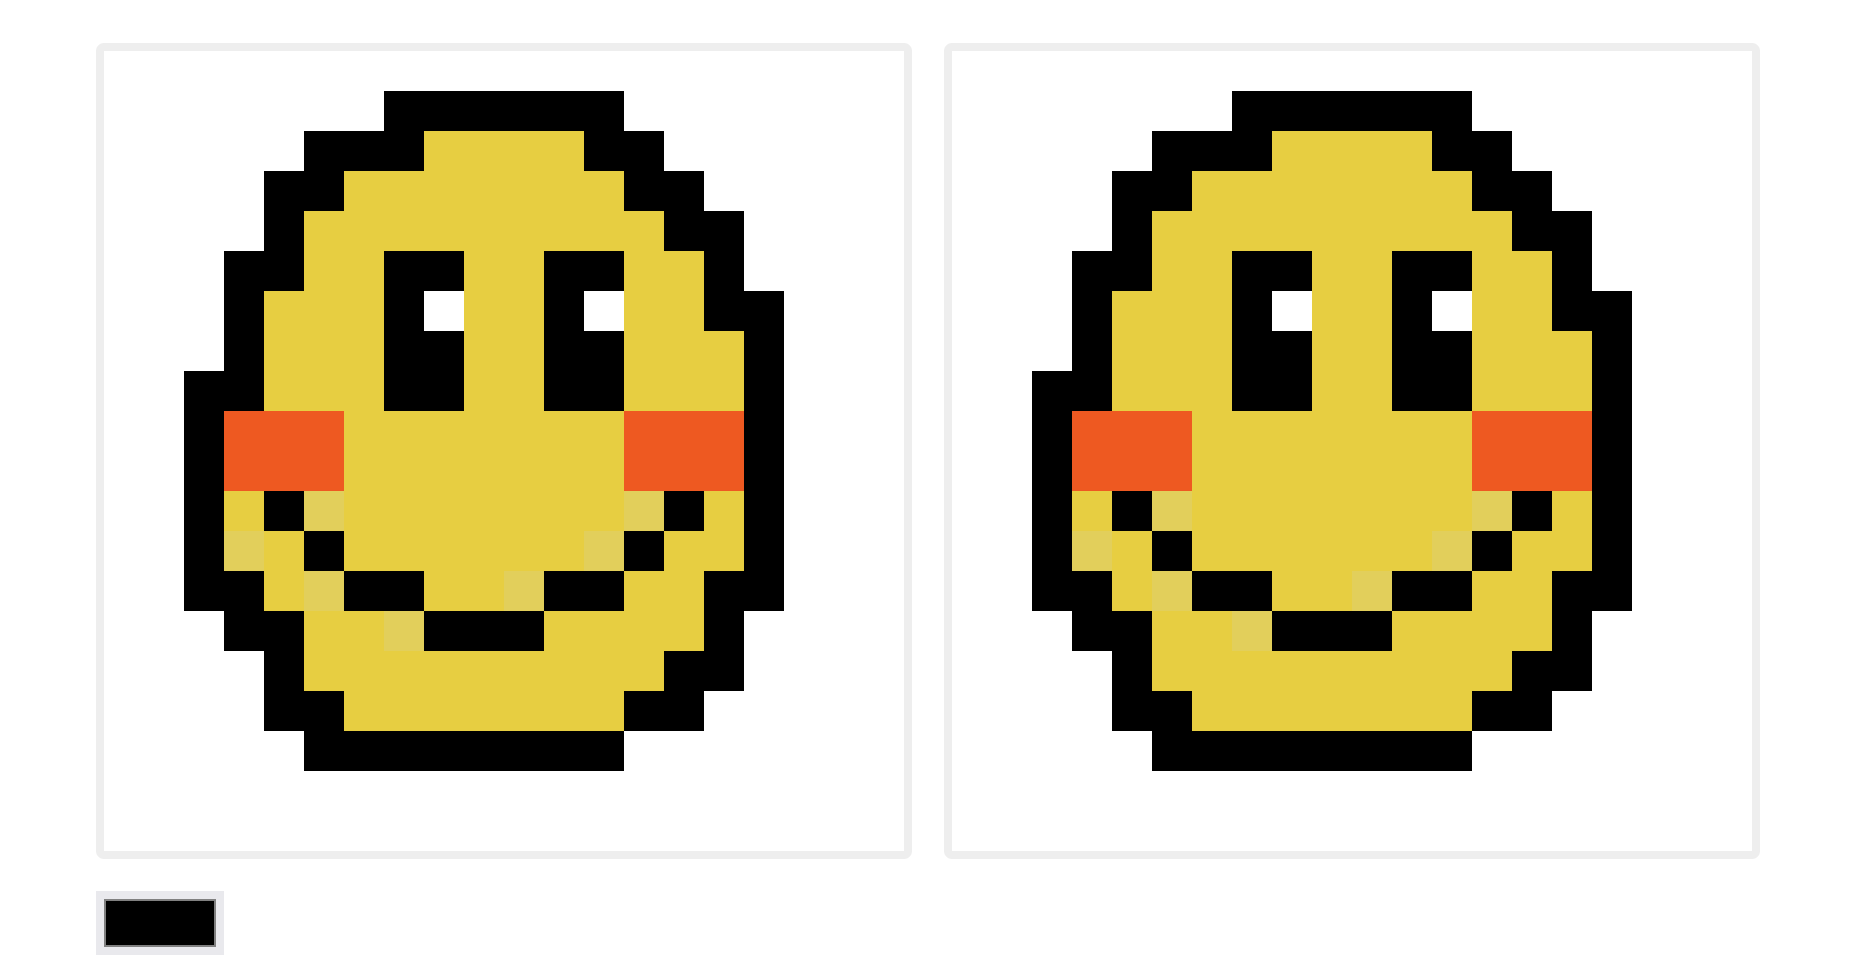 crdt-pixel-art-editor - CodeSandbox A toy collaborative pixel art editor, built with CRDTs.
 %20%20%7Bpath%20%7Bfill:%20white;%7D%7D%3C/style%3E%3Cpath%20fill-rule='evenodd'%20clip-rule='evenodd'%20d='M81.8182%2018.1818V81.8182H18.1818V18.1818H81.8182ZM10%2090V10H90V90H10Z'/%3E%3C/svg%3E) codesandbox.io/s/crdt-pixel-art-editor-s6f9fh .
codesandbox.io/s/crdt-pixel-art-editor-s6f9fh .
Next Steps
We’ve learned about CRDTs and built an actual collaborative app with them — but we can still improve our design. Check out the surprise part three: Making CRDTs 98% More Efficient  Making CRDTs 98% More Efficient | jakelazaroff.com State-based CRDTs grow monotonically, but that doesn't mean they can't be efficient. We'll learn how to compress the pixel editor state by 98%.
 jakelazaroff.com/words/making-crdts-98-percent-more-efficient/
Reading List
Hopefully these posts have made you interested in learning even more about CRDTs! Here’s a list of articles I leaned on heavily to write this one:
- Designing Data Structures for Collaborative Apps Designing Data Structures for Collaborative Apps - Matthew Weidner
mattweidner.com/2022/02/10/collaborative-data-design.html introduces some primitive CRDTs and shows how to combine them. Reading this article convinced me that I don’t need a math PhD to engage with this topic.
- An introduction to Conflict-Free Replicated Data Types
 An introduction to Conflict-Free Replicated Data Types · Part 1: Preliminaries
 lars.hupel.info/topics/crdt/01-intro/ is a tutorial series with interactive code samples that gives a good practical overview of CRDTs.
- A CRDT Primer Part I: Defanging Order Theory
A CRDT Primer Part I: Defanging Order Theory Exploring the theory underlying CRDTs (convergent replicated data types) and demystifying monotonic join semi-lattices in the process.
blog.jtfmumm.com//2015/11/17/crdt-primer-1-defanging-order-theory/ and A CRDT Primer Part II: Convergent CRDTs
Footnotes
-
Familiarity with the browser’s 2D canvas API
 Canvas tutorial - Web APIs | MDN This tutorial describes how to use the <canvas> element to draw 2D graphics, starting with the basics. The examples provided should give you some clear ideas about what you can do with canvas, and will provide code snippets that may get you started in building your own content.
  developer.mozilla.org/en-US/docs/Web/API/Canvas_API/Tutorial will help when we get to the internals of the pixel art editor. But it’s not required to understand how the CRDT works or how it’s used in the app. Think of it as extra credit. ↩
 -
Sorry about the huge pixels. I didn’t want the page to get too long as the maps below fill out. ↩
-
Hex codes are actually just RGB colors encoded in base 16 (hexadecimal). Every two letters of a hex code combine to form one byte.
#845ef7can be split into84(red),5e(green) andf7(blue), which works out to132,94and247in base 10 (decimal, or “normal” numbers). ↩ -
The examples in this article simulate network latency by wrapping each
receivecall in asetTimeout. If you want to actually wire up this pixel art editor to the network, you can connect two peers using something like WebSockets WebSocket - Web APIs | MDN The WebSocket object provides the API for creating and managing a WebSocket connection to a server, as well as for sending and receiving data on the connection. developer.mozilla.org/en-US/docs/Web/API/WebSocket or WebRTC  WebRTC An open framework for the web that enables Real-Time Communications (RTC) capabilities in the browser.
 webrtc.org/ . Because we’re using a state-based CRDT, the communication protocol is simple: serialize each state to a JSON string before sending it, and parse it back into a JS object when receiving it. ↩
 -
This also handles high resolution displays, in which case the physical monitor pixels might not be equivalent to “logical” canvas pixels on screen — which themselves might not be equivalent to our artboard pixels. Confused? Resizing is tricky, and there’s even a bit more to it, but I didn’t want to get too down in the weeds in this tutorial. If you’re curious, you can read the docs on MDN
Window: devicePixelRatio property - Web APIs | MDN The devicePixelRatio of
Window interface returns the ratio of the resolution in physical
pixels to the resolution in CSS pixels for the current display
device. developer.mozilla.org/en-US/docs/Web/API/Window/devicePixelRatio ; if not, you can think of this as a magic incantation that makes the pixels look crisp. ↩ -
Usually, falling through a switch case is a bug. In this case, we really do want to do it, which is why there’s a
// fallthroughcomment at the end to make it explicit. The// @ts-expect-errorat the top suppresses a TypeScript error if you’ve configured it to report errors for fallthrough cases in switch statements TSConfig Reference - Docs on every TSConfig option From allowJs to useDefineForClassFields the TSConfig reference includes information about all of the active compiler flags setting up a TypeScript project. www.typescriptlang.org/tsconfig#noFallthroughCasesInSwitch (which you should). ↩
 -
We’re leaving some performance on the table here by allocating a new buffer every time we call this function. Really, we should pre-allocate the buffer as soon as we know the artboard size and reuse it in every
#drawcall. ↩ -
The last three lines are pretty idiosyncratic to the JavaScript canvas API, so I’ll just refer you to the MDN documentation for
ImageData ImageData - Web APIs | MDN The ImageData interface represents the underlying pixel data of an area of a <canvas> element. developer.mozilla.org/en-US/docs/Web/API/ImageData , createImageBitmap createImageBitmap() global function - Web APIs | MDN The createImageBitmap() method creates a bitmap from a
given source, optionally cropped to contain only a portion of that source. The method
exists on the global scope in both windows and workers. It accepts a variety of
different image sources, and returns a Promise which resolves to an
ImageBitmap. developer.mozilla.org/en-US/docs/Web/API/CreateImageBitmap and drawImage CanvasRenderingContext2D: drawImage() method - Web APIs | MDN The CanvasRenderingContext2D.drawImage() method of the
Canvas 2D API provides different ways to draw an image onto the canvas. developer.mozilla.org/en-US/docs/Web/API/CanvasRenderingContext2D/drawImage . ↩ -
Remember that the
pointerdowncase also falls through topointermove. ↩ -
Remember when I said that the app “mostly” doesn’t realize it’s using a CRDT under the hood? This is an example of the abstraction leaking through. If we were just writing pixel data and didn’t care about the timestamps, we wouldn’t have to bother with this step. ↩